Showing posts with label Nail Arts. Show all posts

घर पर नेल आर्ट कैसे करें How To Make Beautiful And Shiny Nails At Home

हाथों की खूबसूरती बढ़ाने में सबसे बड़ा कमाल होता है नाखूनों का अगर आपकी नाखून हेल्दी और खूबसूरत हैं तो जाहिर है आपकी खूबसूरती भी बढ़ेगी नेल आर्ट आजकल सभी को लुभाती है यह न सिर्फ आपके हाथों को सुंदर बनाती है बल्कि आपको ट्रेन भी लोग भी देती है लेकिन नेल आर्ट से पहले अपने नाखूनों को हेल्दी बनाना भी जरूरी है

स्वस्थ नेल्स पाने के टिप्स

✔ अगर नाखून बहुत जल्दी टूटते हैं तो अपनी डाइट पर ध्यान दें और कोशिश करें कि आप हेल्थी डाइट लें |

✔ नाखूनों की चमक बढ़ाने के लिए नींबू के छिलकों को नाखूनों पर रगड़ें या फिर गुनगुने पानी में नींबू का रस मिलाकर नाखूनों को उस में डुबोए |

✔ नेलपालिस रिमूव करने के बाद क्यूटिकल क्रीम या ऑलिव आयल से नाखूनों की मसाज करें |

✔ कभी भी ब्लेड से नाखूनों को ना काटे, नेल कटर से ही नाखूनों को अच्छा शेप दें |

✔ सबसे पहले नाखूनों पर बेस कोट लगाएं | यह आपके नेल्स को प्रोटेक्ट करेगा और मजबूती भी देगा |

✔ बेस कोट के सूखने के बाद कोई भी ब्राइट कलर की नेलपालिस लगाएं | अगर कलर ज्यादा ब्राइट चाहिए, तो डबल कोट लगाएं |

✔ नेल पालिश का कलर सील करने के लिए सबसे अच्छा तरीका है कि नेल पालिश लगाने के बाद हाथों को कुछ समय तक ठंडे पानी में डुबोकर रखें |

✔ सिमरी की बजाए मैट नेलपालिस लगाएं |

✔ नेलपालिस और रिमूवर दोनों ही अच्छी क्वालिटी के ही रखें, नहीं तो नाखूनों पर दाग पड़ सकते हैं |

टीन्स के लिए नेल आर्ट और जरूरी टिप्स

1. फूटी फ्रेश डिजाइन

आप किसी भी फ्रूट को ध्यान में रखकर कलर और डिजाइन सिलेक्ट कर सकती हैं, जैसे स्ट्रॉबेरी के लिए सबसे पहले रेड कलर का पेंट लगाएं, टिप्स पर ग्रीन कलर का डिजाइन बनाएं और बाकी के हिस्से पर रेड के ऊपर सफ़ेद डॉट्स लगाएं | यह आपको फंकी लुक देगा |

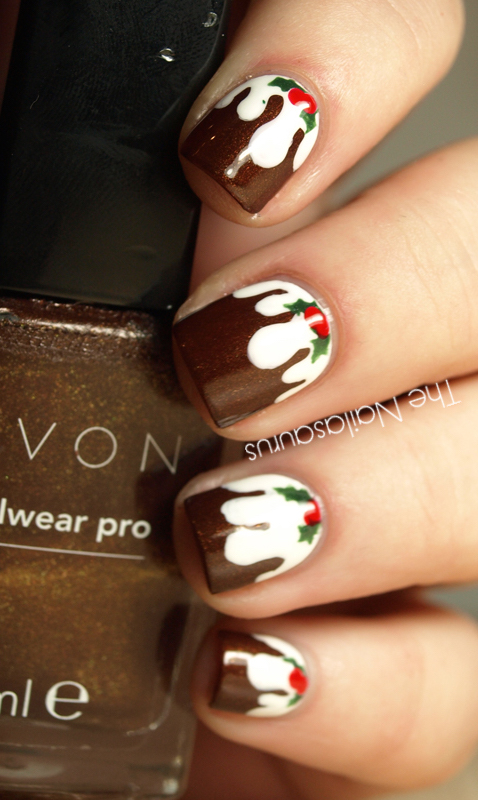
2. स्वीट डेजर्ट डिजाइन

इसके लिए कप केक डिजाइन करें | न्यूट्रल बेस कलर सिलेक्ट करें और फिर टिप पर लाइट और डार्क शेड की लाइन ड्रा करें, जो कप केक के बेस का काम करेगी | उसके ऊपर क्रीम कलर का कप केक डिजाइन करें | केक पर डॉट्स लगाएं और ऊपर रेड कलर की चेरी ड्रा करें और चाहे तो ग्लिटर भी डालें |

3. पोल्का डॉट्स डिजाइन

दो कलर के बेस कलर और दो ही कलर के टिप्स के लिए कलर सेलेक्ट करें | 3 नाखूनों पर एक बेस कलर और टिप कलर लगाएं, बाकी दो पर दूसरा बेस और टिप कलर लगाएं | अब पोल्का डॉट्स ड्रा करें | सफ़ेद या अपने मन पसंद कलर से, वैसे आप अपनी क्रिएटिविटी के हिसाब से अधिक कलर्स भी इस्तेमाल कर सकती हैं |

4. एनिमल प्रिंट डिजाइन

यह बहुत ही ट्रेंडी है | आप जेब्रा या लेपर्ड प्रिंट नेल आर्ट में ट्राई करें | यह आपको कूल लुक देगा | इसके अलावा आप कैट फेसेस ड्रा कर सकती हैं | आजकल हैलो किटी थीम भी फैशन में है |

5. रेनबो डिजाइन

आप सात रंगों को नाखूनों पर उतारकर एकदम कलरफुल लुक पा सकती है | इन सबके अलावा आप Heart ड्रा करके लव थीम इंजॉय कर सकती हैं या फिर छोटे-छोटे मोती चिपकाकर अलग ही आर्ट क्रिएट कर सकती हैं | कोई स्टोरी थीम को लेकर भी नेल आर्ट किया जा सकता है | कुल मिलाकर नेल आर्ट में आपकी क्रिएटिविटी पर काफी कुछ निर्भर करता है कि आप नए-नए डिजाइंस के द्वारा किस तरह से अपने नाखूनों को खूबसूरत बनाती है 

Festive and Bright Nail Art Ideas

The stockings are hung by the mantle with care — and your nails are polished to festive perfection. Find manicure design inspo that highlights every festive

Chic Icicles

We love this subtle nod to winter weather, especially how the silver pops against the ice blue. The thin streaks of different shades of gray look like dangling icicles — a great twist to the popular gradient manicure.ac

parkly Center

If you love a basic white manicure but want to make it more fun for the holidays, just paint one with a gold or silver metallic polish for an added dose of pizzazz.


Shimmering Snowflakes

Red, green, and silver aren't the only holiday-appropriate shades — jewel tones like violet can be just as festive, especially when used to design delicate snowflakes on your double accent nails.

Ode to the Tree

While a manicure might not be everlasting, this deep hunter shade is surely evergreen. For the gold pine tree-like design, use a toothpick for bold, even lines.


Metallic Magic

A classic red polish is definitely holiday-worthy. Just add a few golden beads onto your accent nail for a little more texture.

Midnight Blue

Red and green aren't the only holiday-appropriate shades. A rich navy blue with silver shimmer is a vibrant way to wear glitter

Half & Half

This looks complicated, but it's surprisingly easy. Start with a glossy navy polish, then add a swipe of gold in the middle, and finish it off with a midnight matte shade.

Merry Matte

This festive combo is far from cliché. In fact, it's quite a sophisticated and original version of French tips.

Warm and Fuzzy

Hit a nostalgic note with this delightful knit pattern plus a matryoshka doll accent. The double magenta shades make this a pleasantly pink surprise for the season.
Impress every foodie at your table with these deliciously fudge-y nails that are almost good enough to eat. This manicure may take a little more patience, but it totally pays off.
See more on The Nailasaurus »


Pretty Pudding

Impress every foodie at your table with these deliciously fudge-y nails that are almost good enough to eat. This manicure may take a little more patience, but it totally pays off.


Pretty Pudding

Impress every foodie at your table with these deliciously fudge-y nails that are almost good enough to eat. This manicure may take a little more patience, but it totally pays off.

25 Valentine's Day Manicures You'll Absolutely Adore

Color Block

A candy pink base and bold red stripe make a lovely statement that won't be missed.

Heart to Heart

You'll want to file your nails into an almond shape before creating little ovals on the outer tips of your nails. Let your heart art dry completely before finishing with a clear top coat to prevent smudging and


Dreamy Half Moons

We're over the moon about this cotton candy colored mani, but our favorite part is the minuscule heart stickers. How cute are they?


Cosmic Love

Love have you seeing stars? Channel that celestial feeling through this space-inspired manicure.


Sugar, Sugar

Celebrate the only time of year when these delightful little candies are absolutely everywhere. Don't just eat them — put them on your mani, too!

Eye Heart You

Not all V-Day manicures have to be quiet, sweet and subtle. Get funky with this bold, blue-and-pink graphic design.

Glittery & Gorgeous

Find a new purpose for your makeup sponge by using it to recreate this adorable design that combines all things sweet: glitter, pink, and pastels.


Mod Moon

How adorable is this dotted look? It's like calorie-free candy dots at the tip of your fingers. Plus, you can simply switch up the colors for any other holiday.

Pile on Hearts

It looks tricky, but this mani is actually pretty easy to recreate. Start with your favorite pink as a base, and add on layers of pink and red, just with a slight curve that mimics a heart.


Butter Me Up

Don't feel like you have to stick to traditional colors like pink and red. Unexpected shade like buttery yellow and black work just as well with heart shapes.

Funky Reds

Experiment with negative space for a cool, modern look by using two shades, keeping an empty diagonal gap between them. Pick similar colors like red and scarlet for a coordinated look or opt for contrasting hues to achieve a less-than-subtle style.

Conversation Starter

Inspired by everyone's favorite Valentine's Day candy, this blogger used pale shades of blue, yellow, pink, and purple, plus a few shiny accents to capture the essence of Candy


Dock of Love

Valentine's fan or not, we can all agree that this manicure is too cute not to try. Even better, on the 15th you can simply paint over the accent nail with red, and your lovely


A Little Rosy

Valentine's Day wouldn't be complete without roses — they are the flower of love after all. Nail blogger Sarah painted these pretty petals freehand, but if tackling a bouqet feels too

A Heart of Gold

We can't get over how sweet that little gold heart is.

Inspired by Scrabble pieces, this mani deserves way more than nine points.

Spell It Out

Inspired by Scrabble pieces, this mani deserves way more than nine points.

Spell It Out

Inspired by Scrabble pieces, this mani deserves way more than nine points.


Just Add Stripes

Who knew that baby blue would be the new color of love? Just add a bit of shiny striping tape and a touch of pink glitter for a whole lot of pretty.

ust Add Stripes

Who knew that baby blue would be the new color of love? Just add a bit of shiny striping tape and a touch of pink glitter for a whole lot of pretty.
ust Add Stripes

Who knew that baby blue would be the new color of love? Just add a bit of shiny striping tape and a touch of pink glitter for a whole lot of pretty.

Square Space

This design is oh-so-subtle, yet totally unique and pretty when you get a little closer. Add a pretty set of rings to jazz up the overall look.


Sharing Heartbeats

Talk about poetic — this minimalist manicure turns your nails into a heart monitor, complete with a little extra "love" for your pointer finger.
haring Heartbeats

Talk about poetic — this minimalist manicure turns your nails into a heart monitor, complete with a little extra "love" for your pointer finger.

Double Waves

Play with texture on your nails by swirling matte and glossy designs in this cool magenta take on the typical striped manicure.

Shades of Pink

Tips chipping on your red mani? Add a swipe of pink in seconds.
 

nail arts

Rose Quartz Marble

Rose quartz melds perfectly with marble for a subtle crackled effect.


Pressed Wildflowers

You'll need teeny, tiny flowers for this trendy mani, plus a seriously strong top coat. Press your blooms between the pages of a heavy book to make them flat before adhering, then prepare for mucho compliments.


Masterful Marbling

Marble nail art may seem tricky, but if you follow this three-step tutorial, it's surprisingly simple! All you need: two contrasting colors, a dotting tool, and a little patience.


Going Dotty

Polka dots are always a fave for spring fashion, but there's something totally unique about this bold manicure that layers dots in several shades of purple, creating an almost bubbly, 3D effect.


Geometric Jam

Go for a graphic white and black design for the chic factor, add the grape-colored accents for a playful dash of color.

Soft Glam

You know what they say — a little glitter goes a long way. Bonus: This look doesn't need to be absolutely perfect, so if you don't have a totally steady hand, you can still achieve wonderful results.


Squared Off

If a five-carat ring isn't in your budget, why not opt for diamonds on your nails instead? This geometric design is the perfect way to wear three colors at once.

You've never seen neon — or French tips — quite like this before. Just a thin, delicate stroke of a fluorescent orange makes for a totally new, fresh spring look.


Lively Lines

Play with the negative space in your nail art by striping a few shades of polish diagonally across your nails from one corner to the other.


Cool Colorblocking

This elegant mani couldn't be easier. Just apply one strip of striping tape per nail, paint two coats of a bold spring shade on top, and wait 'til it dries. Voilà! You've got a gorgeous glam look on your hands.


Gilded Moons

Give your nails the gold treatment by painting a thin line of metallic polish around the base of your nails, following their natural shape. Then apply a soft pastel shade in the same shape just a few millimeters higher. Note: This look is best for long nails, as it can make your nail beds appear a little shorter.


Braided Beauty

That's right: braids aren't just for your hair anymore. This overlapping design gives your nails a 3-D look while also giving them the illusion of being longer and slimmer.

Two-Faced

Sometimes the coolest designs are the simplest. Take this two-color split that not only makes your nails look longer, it's also so easy to do. Plus, you get to pick double the spring shades to show off


Poppy Field Fingers

Just because it's not Christmas time doesn't mean you have to put away your red and green polishes — you can still pull 'em out for this pretty poppy look!

Marble Accents

Spice up your typical pastel mani with a marbled accent nail. Keeping it in neutral shades prevents this look from going over the t


Strawberries & Cream

Why choose just one shade of pink when you can use a bunch? The pastel shades of this pretty look make it a classic pick for spring, while the geometric design keeps it modern.


Sun Beams

Bring a sunny disposition to your fingertips with these fun, squiggly lines of warm yellow polish.

Seafoam Leaves

An eye-catching neon manicure gets even cooler when you add a leafy accent nail and a swipe of metallic polish.


Neat Neon

When you think "neon," the word "delicate" doesn't typically come to mind. But because these two bright shades are so close together, the geometric design down the middle is surprisingly subtle. The next time you want to swap out your typical neutrals for something more fun, try this bold idea.


3-Step Nail Art Ideas You Can Totally Do Yourself


Marble Nails: Step 1

Pick two contrasting colors — the more different they are, the better this design will show up. Apply one coat of the lighter of the two shades to all your nails, then let it dry. Once it's dry, apply a second coat that's much thicker than the first.


Marble Nails: Step 2

While the second coat of your lighter color is still wet, use a dotter tool to apply your contrasting polish.


Marble Nails: Step 3

Using the dotter tool, swirl your colors together. If your nails start looking a little too blended and you desire higher contrast, you can always add a couple more drops of the lighter shade. Let dry, then add top coat.


Marble Nails

Just like that, you've got deliciously swirled nails!

Colors used: Floss Gloss Nail Lacquer in Dinge, Floss Gloss Nail Lacquer in Picnic.


Reverse French Tip: Step 1

If you have longer nails, you'll love this look. Be sure your nails are smooth and filed evenly to make the most of your nail's natural rounded shape.


Reverse French Tip: Step 2

Paint your nails with two coats of a metallic shade, then let dry.


Reverse French Tip: Step 3

Starting about a quarter inch from the cuticle, paint a darker shade in a shape that mimics the curve of your nail. Let dry, then add top coat.


Reverse French Tip

Sexy, feminine, and oh-so-versatile, this design can be created using just about any two shades to fit the season or holiday.

Negative Space With Colorblocking: Step 1

Apply striping tape three-quarters of the way down each clean, dry nail.


Negative Space With Colorblocking: Step 2

Apply two coats of your chosen nail polish to the portion of your nail above the tape. Let dry.

Negative Space With Colorblocking: Step 3

Using tweezers, gently remove the tape. Apply a top coat, then let dry.


Negative Space With Colorblocking

Ultra-simple and so chic, experiment with this technique using both trendy shades or more classic picks. And for an easy twist, use a contrasting color as the base shade.

How To Do Nail Art at Home

This is my first post for M&B and I will try my best to keep the ball rolling. The concept of nail art is not so popular but sure it is a very vast and extensive field from a beautician point of view. Remember that the good looking nails equally reflect a part of your dress up. Many people have begun starting taking this as a career opportunity because it seems a profitable business to them. I think that you will soon find shops making attractive designs on your nails, like today you have tattoo making shops in the market. And I am sure that if you try this art once, you will really enjoy it and you would find yourself lost with this. According to me this art is purely based on ones imagination, and you can therefore design your nails according to what is the need of the hour. The best part of the story is that it is not so much time consuming and also no so costly.

Different variants of Finger Nail Art Probably the simplest and best-known variant of nail art is the painting of the fingernails with nail polish. The nail is covered with a thin layer of lacquer with the desired color. There are huge amount of coating shades available in the market, so go with the color you prefer the most. I think this form of nail art is tested by most women.
Women now can also grow their nails with UV gel or acrylic. This is also a course covered in the nail art. In stores, many products such as color gel, powder glitter, rhinestones, nail art sticker, shell splinters, nail tattoos, etc. are available to perform this art.

Some of the nail art accessories are also used in modeling. For example, a Glitter powder is mixed with UV gel and this solution can be used for joining the nail. Other nail art products are placed at the end of modeling. Self-adhesive nail stickers are placed for example at the end of the nail and covered only with a clear lacquer. I recommend that you should use branded UV gel (some branded companies offering UV gel are: EDGE, SHEBA NAILS, KRYSTAL GEL) It is entirely possible to combine different nail art items at a modeling together. In particular, creative and experienced nail designers like to make their use, and let their imaginations run wild. Thus, the fingernails of the individual client seems to look unique and stand out from the masses. For processing of nail art you need only a few standard tools that you should have always at hand. Special thin Nail art brush with very fine quality of hair required, for example these are used in the processing of color gel or paint to draw clean lines and color shading. Here, the use of a so-called spot is recommended to draw swirls. For placement of Nails stickers and rhinestones you need tweezers or a nail design pusher.

Before you start with, I will suggest that you use a good quality nail polish as this would ensure a better look of your nails. Here is a tutorial (an example of nail art). I tried this time with a bluish green-colored nail polish in combination with a purple and pink design. One hundred percent satisfied, I’m still not, but maybe this attempt says yes to one or another of you. Here is a short example to get started with: (Refer the picture given below)

  1. First of all using Nail Polish remover, remove old nail polish and make sure that the nails are properly cleaned.
  2. Now, apply one thin layer of base coat (it would protect the nails from staining). Leave it to dry. If you think that the base is not strong, then better add one more thin layer over it. But avoid thick layers as it takes a lot of time to dry properly.
  3. Next, apply the base. (According to the photo shown below it is bluish color).
  4. Now use purple color nail polish to make diagonal lines on the nails. (Important: make it sure that the original blue base does not intervene with this color and also see to it that the lines are not too thick. So if you have a nail brush that is not so thin, then better use toothpicks). Now leave it for sufficient time so that it could dry.
  5. Now take purple color nail polish and make dots in between the lines that have drawn already. (Refer picture for more clarity).
  6. Now comes the most important step, the top coat. Not using top coat can completely damage your hard work and the creation. Make it sure that before you apply top coat the initial nail paint is completely dried, otherwise it may intervene with other colors. I suggest that you must wait for atleast half hour before you use top coat.

Add Glamour To Your Nails With These 5 Amazing Glitter Nail Art Designs

You can create amazing nail art designs at home, without spending a bomb. The next time you fancy a change in the way your nails look, stay right at home.

I’m not big on nails. I’m constantly pottering about with my plants, have my two dogs to take care of and I like dabbling in painting too. All this leaves really little scope for well-shaped, nicely-painted nails.
But if you’re nothing like me, or by some stroke of magic, you can do all this and still manage to have lovely nails, then I doff my hat at you.
I’m sure you have a lot of colours and nail care accessories at home. Or do you like to go to the salon every time you want to get your nails done? Have you tried glitter nail art? Why am I asking; of course you must have. A diva like you has to have her nails, err, fingers in everything.
But you do know how expensive and sometimes creatively limiting these salons can be. How about sitting down on a weekend, calling the girls over and doing some nail art glitter right at home?
I’ve got so many ideas that I’m simply bursting to tell you about, but space is limited and I want to show you some of the best and the easiest glitter nail art designs.

5 Gorgeous Glitter Nail Art Designs

#1 The ombre effect
An ombre is when you cover your nail in two or more colours.
  • First, allow your base coat to dry completely.
  • Take your preferred glitter and paint a strip at the tip or create a half-moon at the base of the nail.
  • To get a faded effect, you can concentrate the glitter closer to the edge on either side and just drizzle it along the way.
  • Remember to do a clear top coat on each nail to lock the glitter in.
You can also create an ombre with your base coat first.
  • Red-orange, blue-white or even black-white combos look really cool.
  • Once this coat dries, cover the entire nail with 1-2 coats of glitter.
Splendid! If you do this to match your outfit, you will dazzle the dance floor, ladies.
#2 An ombre, with a difference
If you want to go more creative, you can try two different glitter colours to sparkle up your nails.
Or you can try shifting directions. Instead of painting the tip or the base, you can paint one half of your nail, vertically.
#3 The easy-peasy, dipped technique
The easiest way to get a coat of glitter is the dip technique.
  • Paint on your base coat.
  • But before it dries, dip your finger in the bottle of glitter.
  • Instant glitter nails!
  • Clean off the sides
  • Apply a clear top coat if you want, or leave it off for a living-on-the-edge look.
You can try the dip technique for an ombre as well. Be prepared for slightly uneven and unequal nails though.
#4 Sparkle nail art
Are all these too simple for you? You can up the game a bit by trying something more creative than a simple dip-and-go.
Apply a fresh base coat.
  • Allow it to dry completely.
  • Using some tweezers and a rock-steady hand, stick a single small jewel or create a pattern on your nail.
  • I recommend doing the pattern near the base where it’s less likely to come off.
#5 Designing with colour
If you’re really brave (I know I’m not) you can create a pattern with your colour. There are two ways of doing that.
  • You can first cover your nail with the glitter polish.
  • Once it dries, paint a design around it with a contrasting solid colour.
  • Alternatively, you can create cut-out patterns on your nails and fill in those with glitter paint.

Which one of these do you think you’ll try first? To keep the glitter on for longer, always use a gentle cleanser like Olay Total Effects 7 in One Foaming Cleanser that will not wash away the sparkle too soon.

Nail Art Designs Trending

Single Stripe
The single stripe nail art is trending this season as opposed to the multiple stripes of last year. Choose a nude or paler colour for the background and make a gold, black or any other colored stripe on your nails to get the single stripe nails. One of the biggest perks is that it is really easy to make!
single stripe nailart
Geometric nails
Squares, triangles, rectangles and straight lines…whatever geometrical shape you can think of, paint them on your nails, for the geometric nails are trending again! Although it takes quite a lot of effort to get them using the nail art tape, they are worth it in the end.
geometric nails art

Graffiti Nail Art

Graffiti Nail Art Tutorial - Nail Designs for Short Nails
Simplicity is style. This gold and black dual tone manicure is quite easy to achieve and doesn’t require any special tools. To create this graffiti nail art look, wipe off excess nail polish from the brush and swipe on random stripes onto your black painted nails. Voila – you are done!

Turquoise And Gold Nails

Turquoise and Gold Nails - Cute Nail Designs for Short Nails
Get the appearance of beautiful turquoise and gold stones on your nails with this manicure. All that you need is a turquoise polish, a gold polish, and a plastic wrap. After applying the turquoise, apply some of the gold onto a crushed plastic wrap and dab slightly onto your nails to create the desired effect.

Nautical Nails

Nautical Nails

What You Will Need

  • White nail polish
  • Navy blue nail polish
  • Red nail polish
  • Nail striper or a fine paint brush.
  • Toothpick

How To Apply?

  1. Start with a white base.
  2. Use a nail striper dipped in navy blue nail polish to create stripes.
  3. Now, using the blunt side of a toothpick, create an anchor design. First, create a tiny circle.
  4. Then, create a line down from the circle.
  5. Draw two lines from the vertical line so it looks like an anchor.
  6. Finally, draw a horizontal line in the middle to complete it.
  7. Seal it with a top coat and you are ready to sail away!

Pastel Daisies Nail Art Tutorial

Pastel Daisies Nail Art Tutorial

What You Will Need

  • Base Coat
  • Pastel pink nail polish
  • White nail polish
  • Gold studs, bindis, or gold polish.
  • Gold glitter nail polish
  • Dotting tool or a bobby pin

How To Apply?

  1. Apply a base coat.
  2. Apply the pastel pink polish to all your nails except the ring finger.
  3. Place a gold stud near the cuticle of the index and pinky fingernails. Do this while your polish is still wet. This helps it to stick on. In case you do not have any studs or bindis, you can use gold polish.
  4. Now moving onto the middle and thumb. These two nails will be clad in daisies. Use a dotting tool to create 5 dots in a circle so that it looks like a daisy. If you don’t have a dotting tool, you can use the end of a dotting tool.
  5. Place the gold stud or gold nail polish at the center of the daisies.
  6. Now all that’s left is the ring finger. Apply the gold nail polish as the base, and the glitter polish over that. This gives it a more intense look.
  7. Seal everything with a top coat, and there you go!

Chevron Nail Art Tutorial

Chevron Nail Art Tutorial

Okay, I know what you’re thinking. This may seem complicated, but the best part is, it’s actually easy. For the tutorial, red, white and blue were used but the choice of colors is all up to you!

What You Will Need

  • Red nail polish
  • White nail polish
  • Blue nail polish
  • Tape

How To Apply?

  1. Use red nail polish as the base for the chevron nail art.
  2. Strategically place the tape so that it creates a chevron stencil.
  3. Paint over it with the blue polish.
  4. Wait for a minute or so to remove the tape.
  5. Now place the tape as shown near the cuticle and paint the area with white.
  6. Again, wait for a minute before pulling off the tape, and seal it all with a top coat.

Monochrome Polka Dots Nail Art Tutorial

Monochrome Polka Dots Nail Art Tutorial

What You Will Need

  • Black nail polish
  • White nail polish
  • Dotting tool, bobby pin or pencil.

How To Apply?

  1. Paint all of your nails black.
  2. Using a dotting tool, the back of a bobby pin or a pencil dipped into white nail polish, create dots.
  3. It’s as easy as that! Finish with a top coat.

Nautical Nails

Nautical Nails

What You Will Need

  • White nail polish
  • Navy blue nail polish
  • Red nail polish
  • Nail striper or a fine paint brush.
  • Toothpick

How To Apply?

  1. Start with a white base.
  2. Use a nail striper dipped in navy blue nail polish to create stripes.
  3. Now, using the blunt side of a toothpick, create an anchor design. First, create a tiny circle.
  4. Then, create a line down from the circle.
  5. Draw two lines from the vertical line so it looks like an anchor.
  6. Finally, draw a horizontal line in the middle to complete it.
  7. Seal it with a top coat and you are ready to sail away!

Pastel Daisies Nail Art Tutorial

Pastel Daisies Nail Art Tutorial

What You Will Need

  • Base Coat
  • Pastel pink nail polish
  • White nail polish
  • Gold studs, bindis, or gold polish.
  • Gold glitter nail polish
  • Dotting tool or a bobby pin

How To Apply?

  1. Apply a base coat.
  2. Apply the pastel pink polish to all your nails except the ring finger.
  3. Place a gold stud near the cuticle of the index and pinky fingernails. Do this while your polish is still wet. This helps it to stick on. In case you do not have any studs or bindis, you can use gold polish.
  4. Now moving onto the middle and thumb. These two nails will be clad in daisies. Use a dotting tool to create 5 dots in a circle so that it looks like a daisy. If you don’t have a dotting tool, you can use the end of a dotting tool.
  5. Place the gold stud or gold nail polish at the center of the daisies.
  6. Now all that’s left is the ring finger. Apply the gold nail polish as the base, and the glitter polish over that. This gives it a more intense look.
  7. Seal everything with a top coat, and there you go!

Stripes and Lines Nail Art Tutorial

Stripes and Lines Nail Art Tutorial

What You Will Need

  • Pastel blue nail polish
  • Brown nail polish
  • Tape

How To Apply?

  1. Start with the pastel blue as your base.
  2. Once it is fully dry, you can begin the placement of your tape.
  3. On the pinky, place it diagonally.
  4. Cut up thin stripes for the ring finger.
  5. Create a ‘V’ shape from the tape for the middle finger.
  6. Create very sharp angled triangles with the tape and place them on the index finger as shown.
  7. Similarly, create a design for the thumb finger.
  8. Now, paint over the tape stencils you just created with brown nail polish.
  9. Wait for a minute or so for the nail polish to dry a little and then carefully remove the tape.
  10. Voila! You have yourself a fun manicure!

. Galaxy Nails

Galaxy Nails

What You Will Need

  • Black nail polish
  • Metallic green nail polish
  • Pink nail polish
  • Blue nail polish
  • Makeup sponge
  • Glitter top coat

How To Apply?

  1. Start with a black base.
  2. Apply some metallic green on a makeup sponge and dab it onto your nail.
  3. Now apply the pink on a makeup sponge and dab onto the nail.
  4. Continue the same process a blue shade.
  5. By this point, your nails will already start to resemble the galaxy.
  6. To amp up the game, add a glitter top coat, and you’re good to go!

. Glitter V-Tip Nail Art Tutorial

Glitter V-Tip Nail Art Tutorial

What You Will Need

  • Black nail polish
  • Silver glitter nail polish
  • A ‘V’ shaped sticker or a piece of tape.

How To Apply?

  1. Paint all your nails black as the background color.
  2. Place the V sticker or the corner of a piece of tape near the tips as shown.
  3. Paint the bottom half with the glitter polish.
  4. Wait for a minute before you carefully pull away the tape or sticker.
  5. Finish it off with a top coat.
Powered by Blogger.